In the world of paper crafting, Stampin’ Up! has become synonymous with creativity, quality, and the joy of handmade cards. Whether you’re a seasoned crafter or a complete novice, creating your own personalized cards with Stampin’ Up! products are a delightful and rewarding experience.
In this comprehensive guide, we’ll explore the essential steps and tips to help you embark on your journey of crafting beautiful and meaningful Stampin’ Up! cards.
Gathering Your Supplies
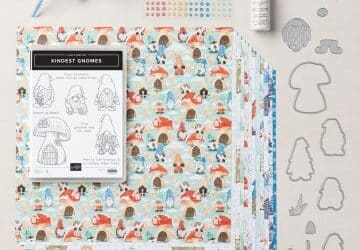
Before diving into the creative process, it’s essential to gather all the necessary supplies. The beauty of Stampin’ Up! lies in its coordinated product lines, making it easy for even beginners to create stunning cards with minimal effort. Here’s a checklist of the basic supplies you’ll need:
Stamp Sets and Ink Pads:
Start by selecting a stamp set that resonates with the theme or occasion of your card. Stampin’ Up! offers an extensive range of high-quality, photopolymer stamps. Choose coordinating ink pads in a variety of colors to bring your designs to life.
Cardstock and Designer Series Paper (DSP):
Cardstock serves as the foundation for your cards, providing stability and structure. Stampin’ Up! offers a wide array of colored cardstock and beautifully designed DSP to complement your projects. Mix and match these elements to add texture and visual interest to your cards.
Cutting and Scoring Tools:
Invest in a good paper trimmer and a scoring tool for clean and precise cuts. Having these tools ensures that your cards have a professional finish. Stampin’ Up! provides high-quality cutting tools that make the process smooth and enjoyable.
Adhesives & Dimensionals:
A variety of adhesives, such as double-sided tape, liquid glue, and dimensionals, are essential for assembling your cards. Dimensionals add depth and interest by creating a 3D effect, making your designs pop.
Embellishments:
Enhance your cards with embellishments like ribbons, sequins, and enamel dots. Stampin’ Up! offers a vast selection of coordinating embellishments that add the perfect finishing touch to your creations.
You can click this link to start browsing my online store where you can find all that you need to get started:
https://stacieford.stampinup.net/
Stamping Techniques for Stunning Designs
Now that you have your supplies ready, let’s explore some stamping techniques to elevate your card designs. Stampin’ Up! stamps are known for their intricate details and versatility, allowing you to create a wide range of effects.
Layered Stamping:
Create depth and dimension by layering stamps. Start with the base layer, typically a solid image, and then add details with subsequent layers using different colors. Stampin’ Up! often provides layering guides with their stamp sets, making it easy to achieve professional-looking results.
Masking Technique:
Achieve the illusion of overlapping images by using the masking technique. Stamp the image you want to appear in the foreground on a sticky note, fussy cut it, and then use it as a mask when stamping other elements. This technique adds a sense of depth and complexity to your designs
Embossing:
Embossing adds an elegant and tactile element to your cards. Stampin’ Up! offers both dry embossing folders for texture and heat embossing powders for a raised, glossy finish. Experiment with different embossing techniques to create eye-catching focal points on your cards.
Watercolor Stamping:
Embrace the beauty of watercolor by using water-based markers or ink pads to create soft, blended backgrounds. Stamp your image on watercolor paper and then use a water brush or blending pen to add color. Stampin’ Up! offers a range of watercolor-friendly products for this technique.
Design Your Card Layout
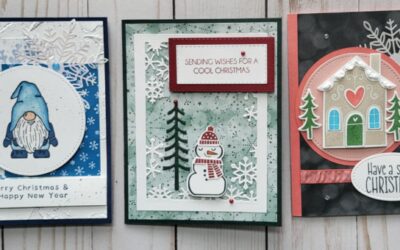
With your stamped elements ready, it’s time to design the layout of your card. The arrangement of images, sentiments, and embellishments plays a crucial role in the overall visual impact of your creation.
Card Sketches for Inspiration:
If you’re unsure where to start, consider using card sketches as a foundation. Stampin’ Up! provides catalogs and online resources filled with card samples and sketches to spark your creativity. These sketches offer a blueprint for arranging elements on your card and can be a helpful starting point for beginners.
Balancing Color and White Space:
Pay attention to the balance of colors and white space on your card. A harmonious color scheme enhances visual appeal, while strategic use of white space ensures that your design doesn’t feel cluttered. Stampin’ Up! offers color coordination within their product lines, making it easy to choose colors that work well together.
Focal Points and Symmetry
Identify a focal point for your card, whether it’s a stamped image, sentiment, or embellishment. Create symmetry or asymmetry based on your design preferences, keeping in mind that a well-balanced composition is visually pleasing. Stampin’ Up! products often feature coordinating elements that make it simple to build a cohesive and eye-catching design.
Conclusion:
Creating Stampin’ Up! cards is not just a craft; it’s a journey of self-expression and creativity. Armed with the right supplies, stamping techniques, and design principles, you’ll soon find yourself immersed in the joy of handmade card making. Whether you’re crafting for special occasions or simply sending a heartfelt message, the personal touch of a handmade Stampin’ Up! card is sure to leave a lasting impression. So, gather your supplies, unleash your creativity, and enjoy the fulfilling process of crafting beautiful cards that bring joy to both you and your recipients. Happy crafting!


0 Comments